
Engine Science: Fixing the Rough Running Engine with a Valve Job
Engine Science: Fixing the Rough Running Engine with a Valve Job
By Norman Ng, iSaveTractors
When you encounter an engine that is hard to start, lacks power, runs hot, or just runs badly; your first thought may be to rebuild or replace the carburetor. You spend an hour spilling gas on yourself and afterwards your engine still runs poorly. Your valves may likely be your problem!
The valve takes the most abuse in your small engine. It slams against your cast iron block millions of times during its life. It’s exposed to extreme heat, and is the first to be damaged if your engine’s air filter fails.
By performing a valve job you can get your engine back to running the way it should.
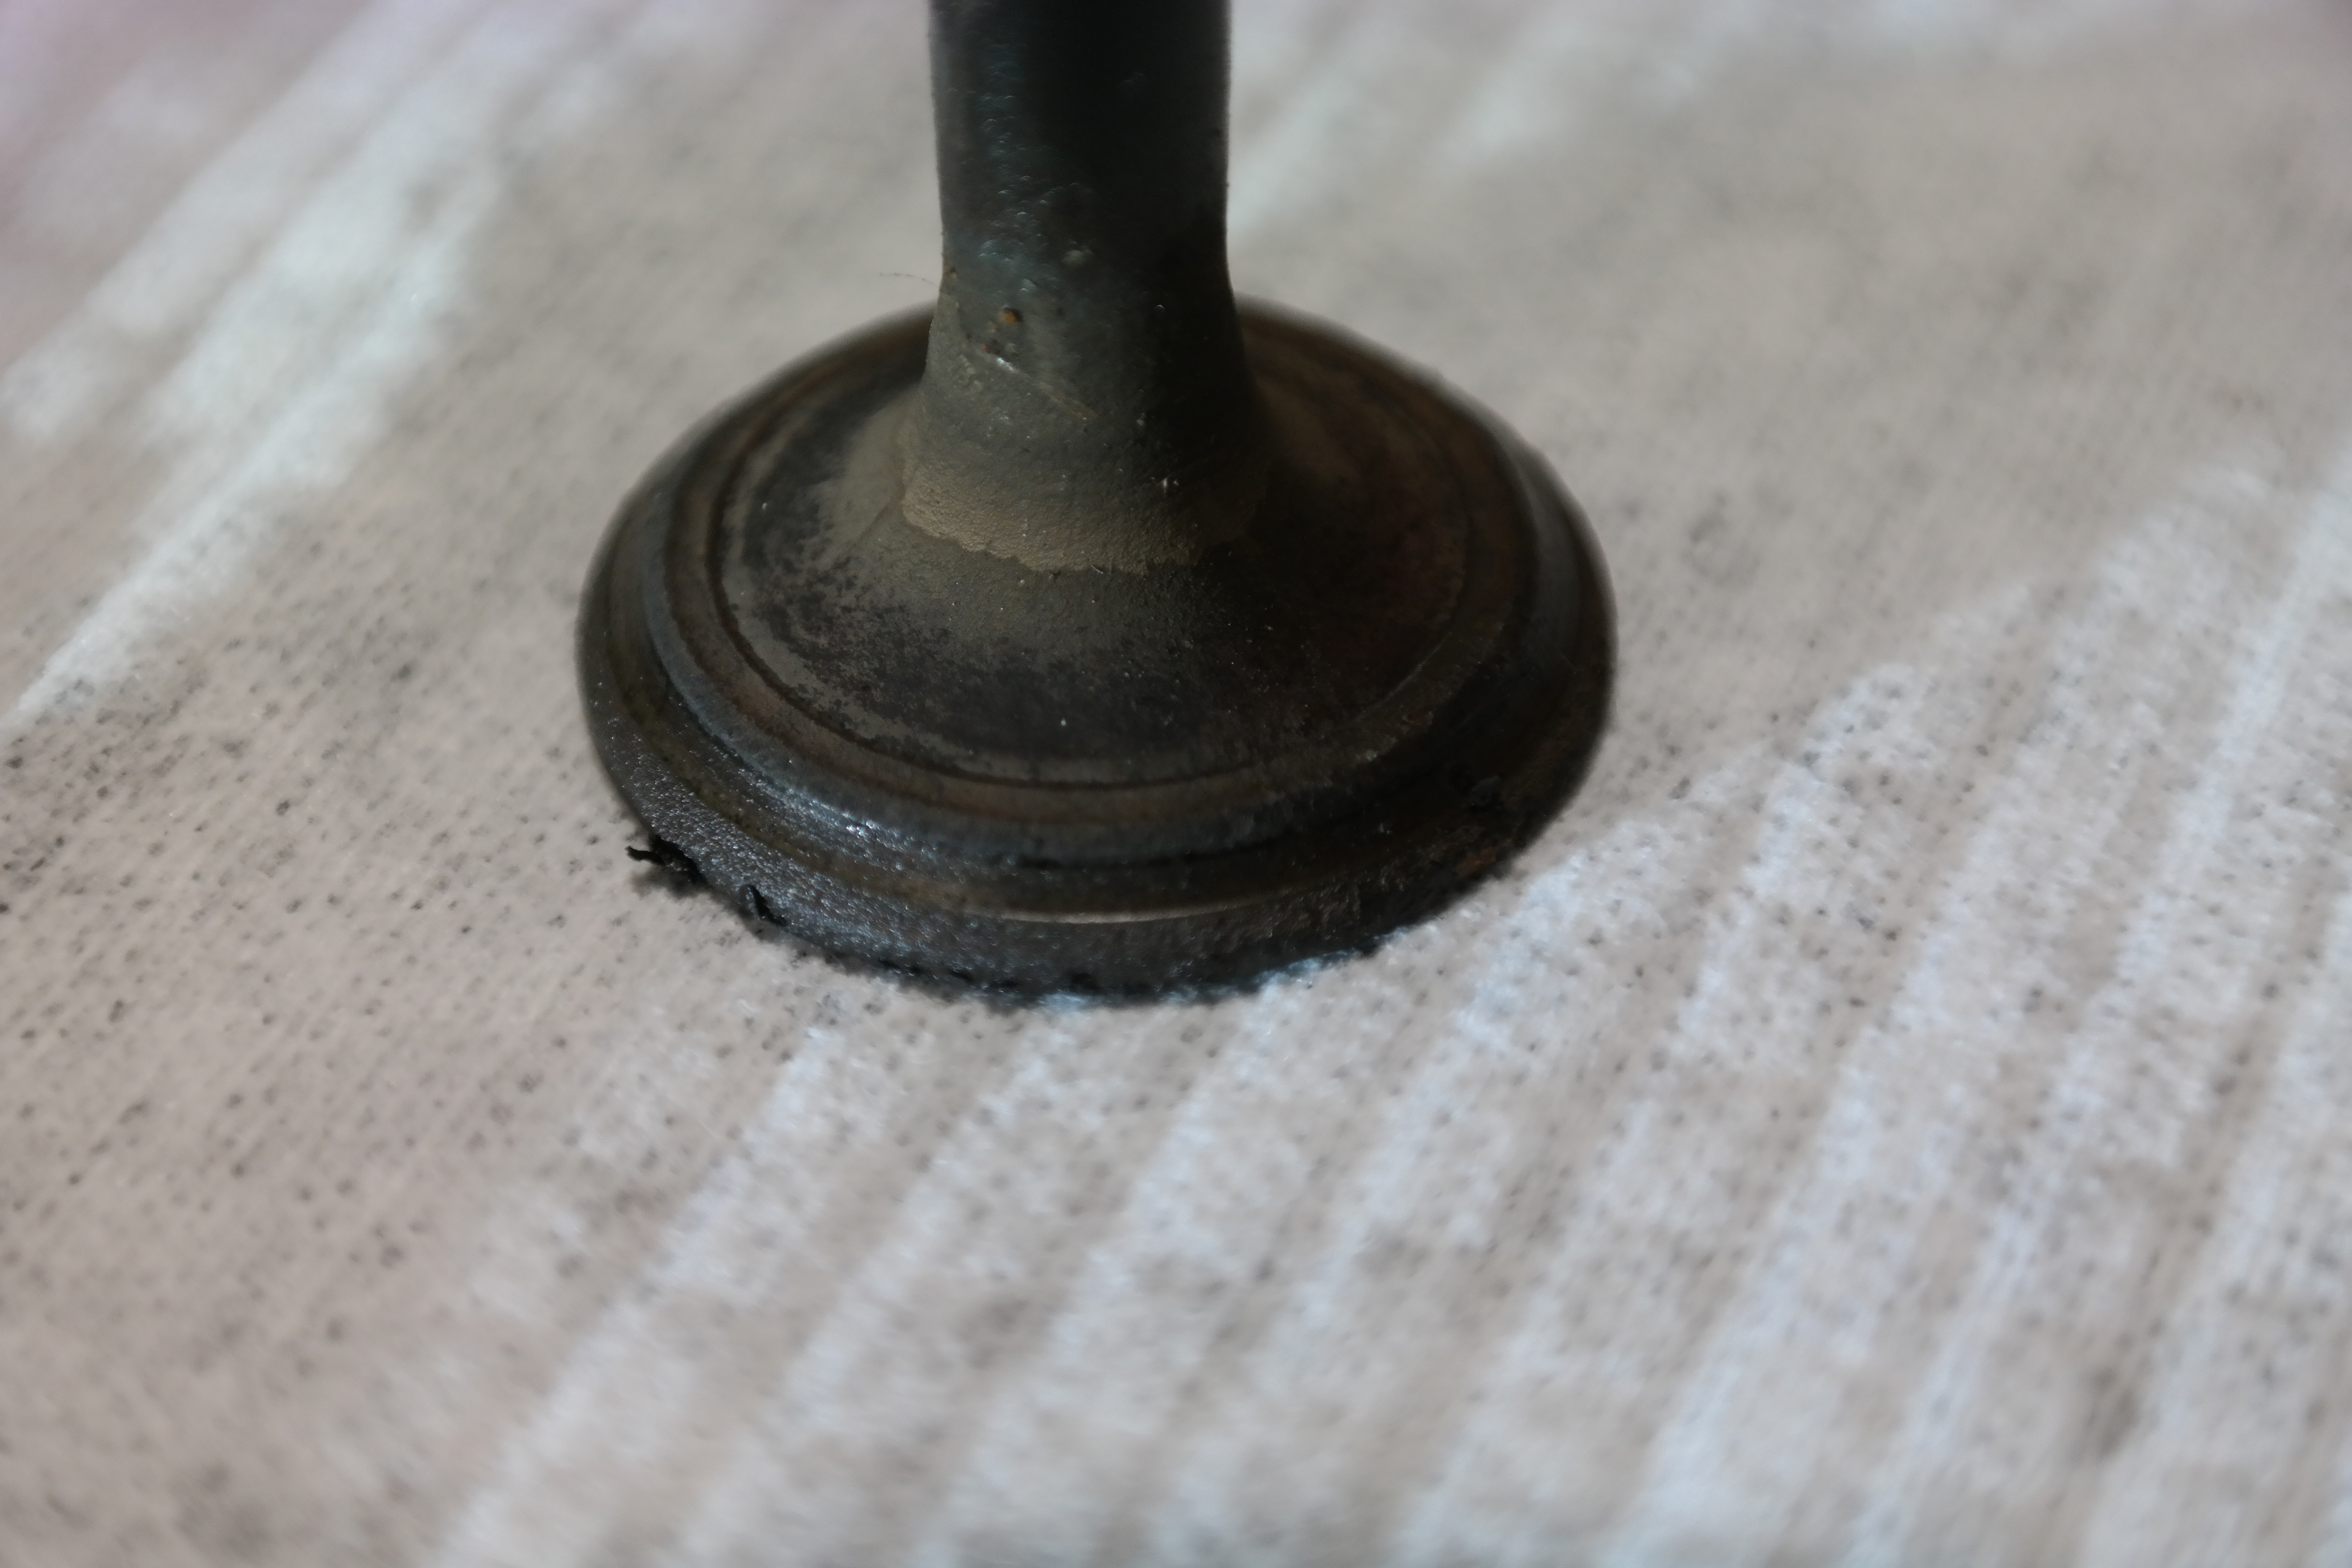
Photo: Worn Valve
What is a valve Job?
Think of your valves as the doors in your home. After a while the door seals will wear, the house will warp and shift with age. After enough time, your doors will develop air leaks and drafts will enter your house. This causes your furnace to work more in order to heat your house. To fix this, you need to restore the seal your doors once provided and keep the weather out. Similarly a valve job is restoring the sealing ability your valves once had.
What do the valves do?
Much like the doors in your home, the valves allow air fuel into the engine and exhaust out of the engine. They are also responsible for closing and sealing off the combustion chamber and make it air tight during the compression stroke.
There are two things we need to correct with the valve job
- The Valve Face
- The Valve Seat
The valve face is the area on the valve that makes contact with the valve seat. It can become worn, warped and pitted over time. In order to correct this you will need a valve face grinder. These are expensive tools, so I recommend replacing the valves with new ones when you can. The rest of this article will assume you are using brand new valves.
The valve seat is the part of your engine block that makes contact with the valve face on the valve. It needs to be cut with a valve seat cutter. A valve seat cutter is also an expensive tool but not as expensive as a valve grinder. If you have a fleet of engines to work on, it is a cost effective purchase. I use a manual Neway Seat Cutter in my shop.
Let’s go over the tools and supplies you will need for a valve job:
- New Valves
- Valve Seat Cutter
- Valve Lapping Compound
- Valve Lapping Stick
- Prussian Blue Dye
New Valves: Brand new valves will have perfect 45 degree or 30 degree faces depending on your engine.
The Valve Seat Cutter: The Neway Valve Seat Cutters I use are a manual cutting tool. It only requires finger pressure to make the cut. These cutters hold carbide cutters at perfect angles for cutting your valve seats. Depending on your engine you may need to cut your valve seats with a 46 degree or 31 degree cutter. There is a 1 degree interference angle to allow your valves to wear into the seats to form perfect seals. The valve seat cutters require a perfect valve guide in order to accurately cut the seat.
Valve Lapping Compound: Valve lapping compound is an abrasive paste that slightly wears both the valve face and seat together. I want to emphasize that the wear is very slight, and cannot replace an actual valve seat cutter. I use valve lapping compound to show me the contact points from the valve seat onto the valve face.
Valve Lapping Stick: A stick with a suction cup on one end. This tool is used to rotate the valve on the valve seat and is used in conjunction with lapping compound.
Prussian Blue Dye: Prussian blue is a colored dye. This is used to transfer a marking from the valve seat to the valve face. This can be cleaned off of the seat and valve after use.
Performing the Valve Job:
Before you begin you must first gain access to your valves and remove the valve springs, keepers, and valves. Then use a combination of solvents, and brass brushes to clean up the valve area of any old grime or combustion deposits.
The valve seat cutters require perfect valve guides to cut accurately. Measure your valve guides and compare them to your engine’s specifications to make sure they are centered and not overly worn. If they are worn, you can either replace them or use a special cutter pilot before continuing.
Insert the valve cutter pilot into the valve guide, and gently place the appropriate valve cutter into the pilot. Using the “T” handle apply gentle finger pressure downwards while rotating the tool. This is all it takes to cut into the valve seats. Do this for a few revolutions. Finish, by turning the “T” handle a few times without applying finger pressure. When done correctly you should see that you have cut a uniform area around your valve seat. Repeat this process with your other valve seat.
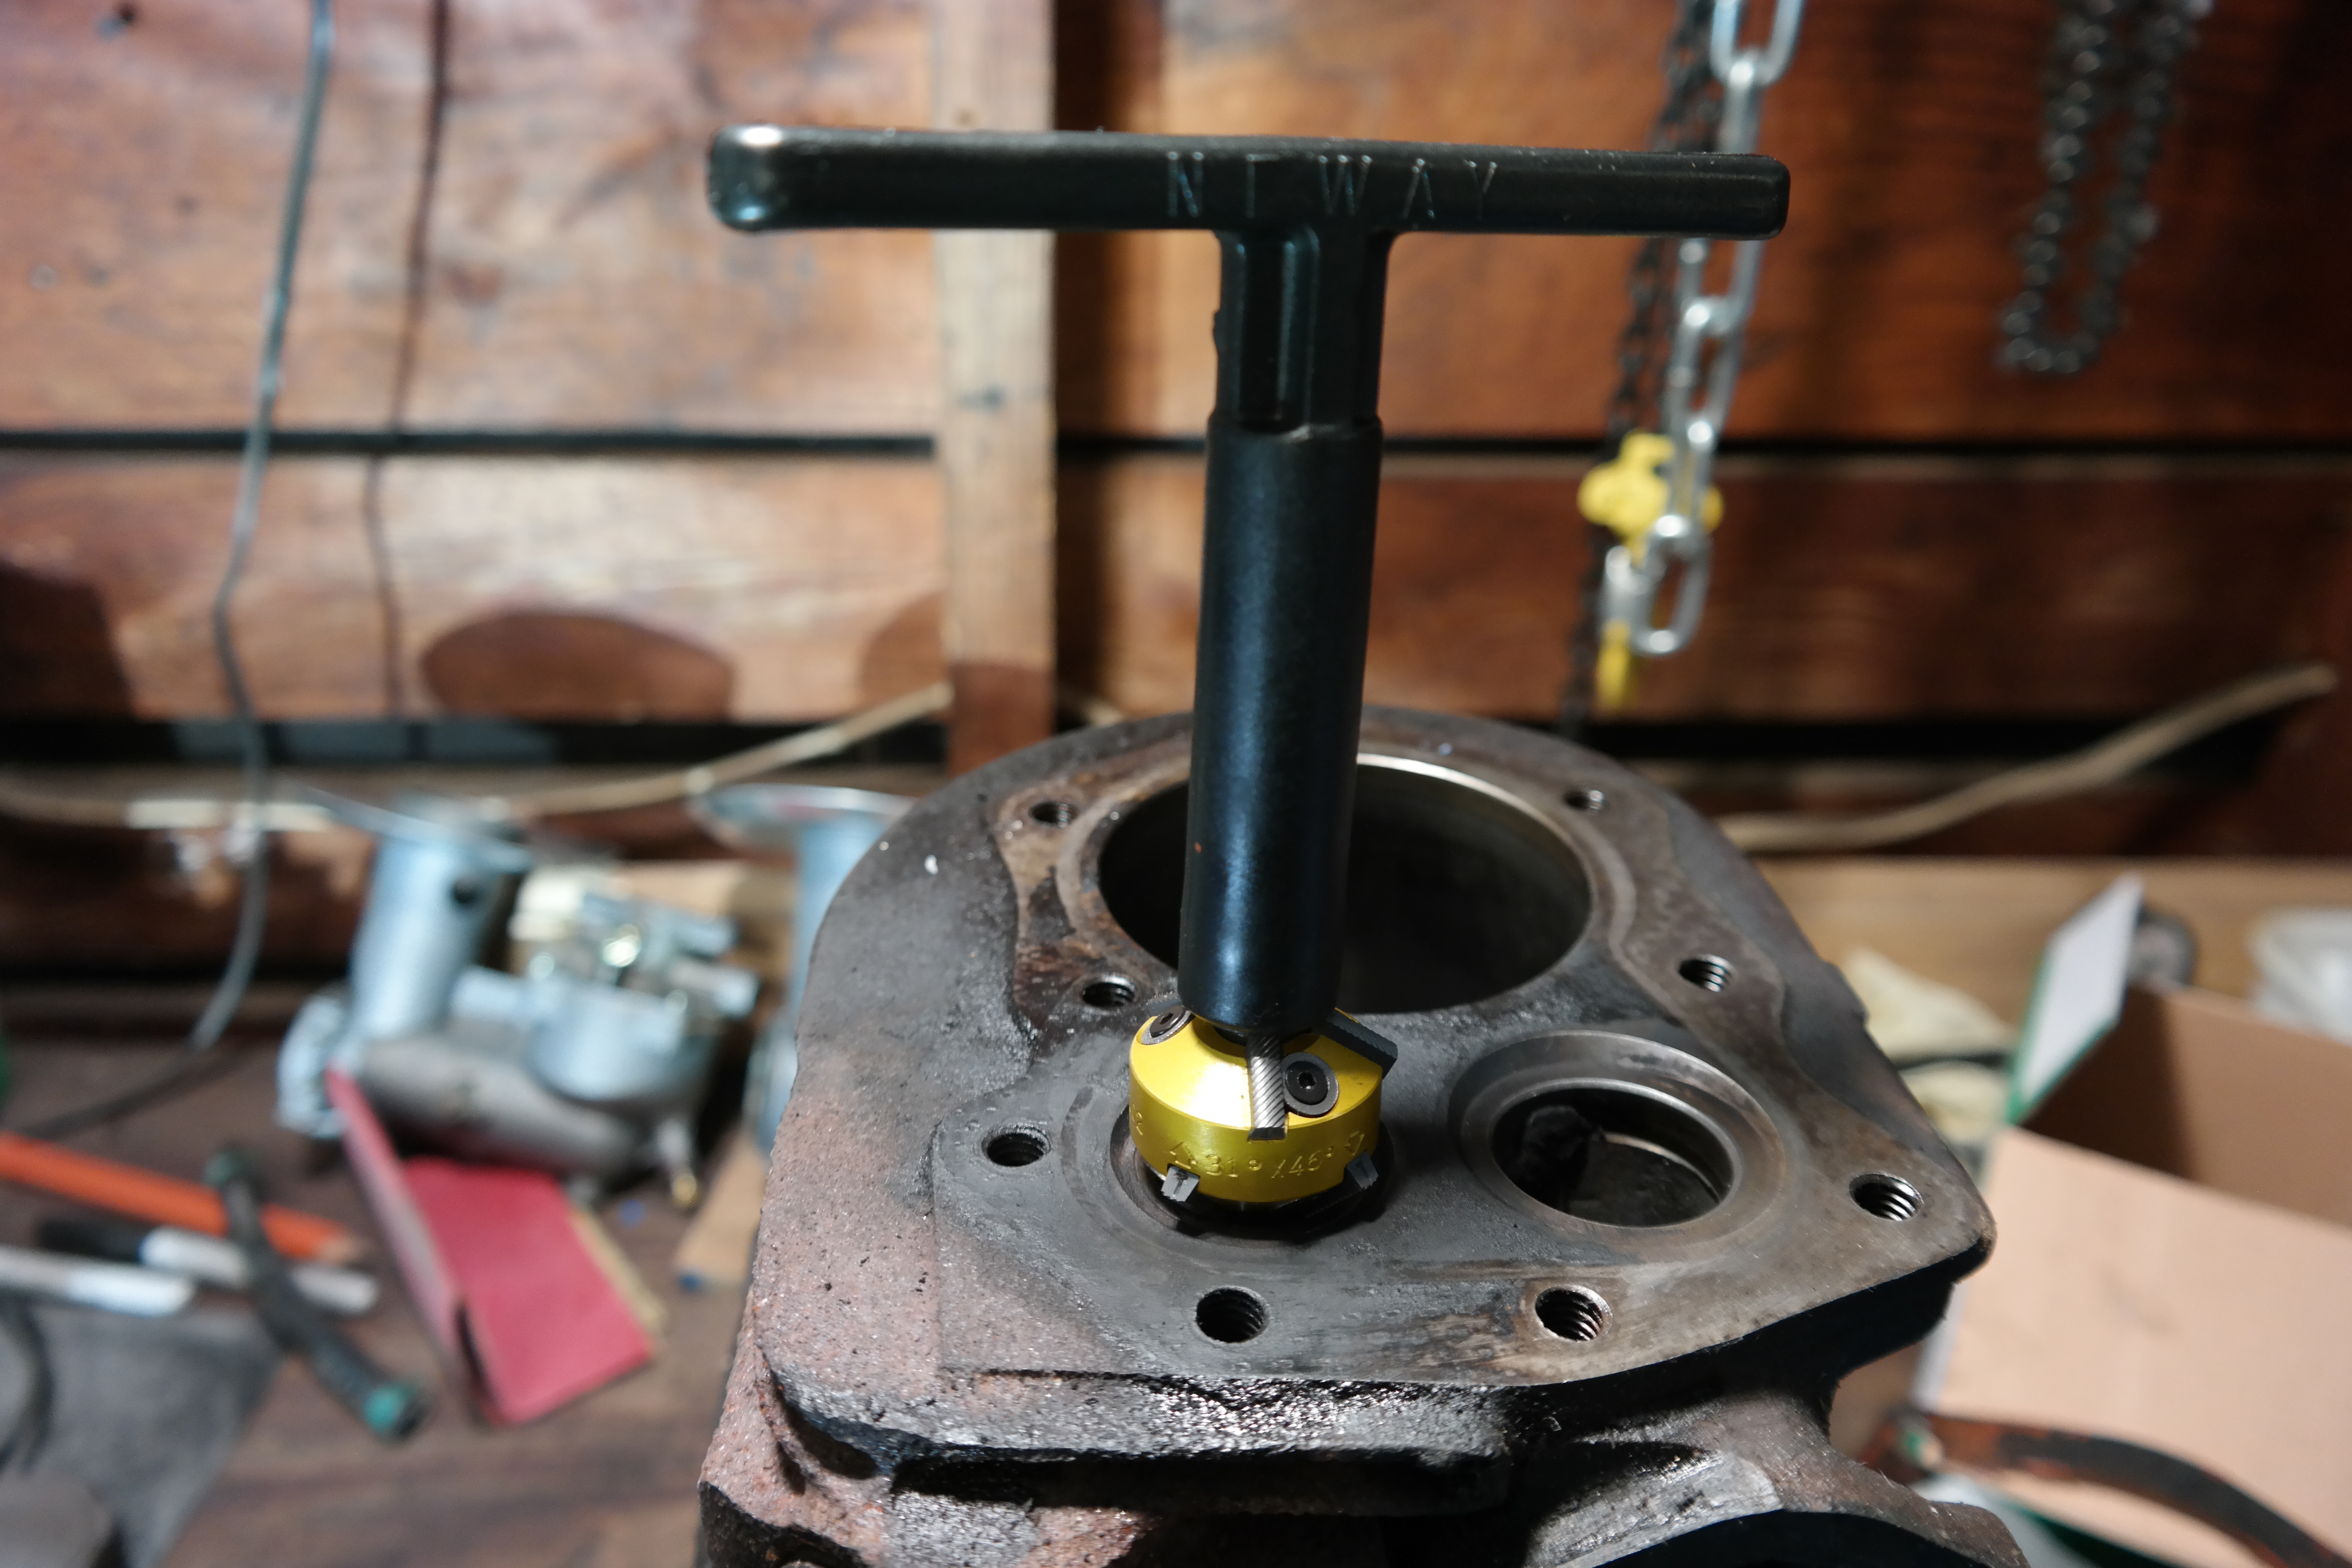
Photo:Valve Seat Cutter
Now that the valve seats are cut, you can test the sealing area by applying Prussian Blue dye to the valve seat. Next gently place your valve into the valve guide and push the valve against the seat while rotating the valve with your fingers. When you remove the valve you will see the contact area on the valve face. Measure the width of this marking with a caliper. This is your seat width. Compare your seat width with your engine’s service manual and make sure it is the correct size. If it is not the correct size; is located too high; or too low; you can correct this with other angle valve seat cutters.
After you have confirmed your valve seat is within specification you can “Lap them in” to help with the valve break-in process.
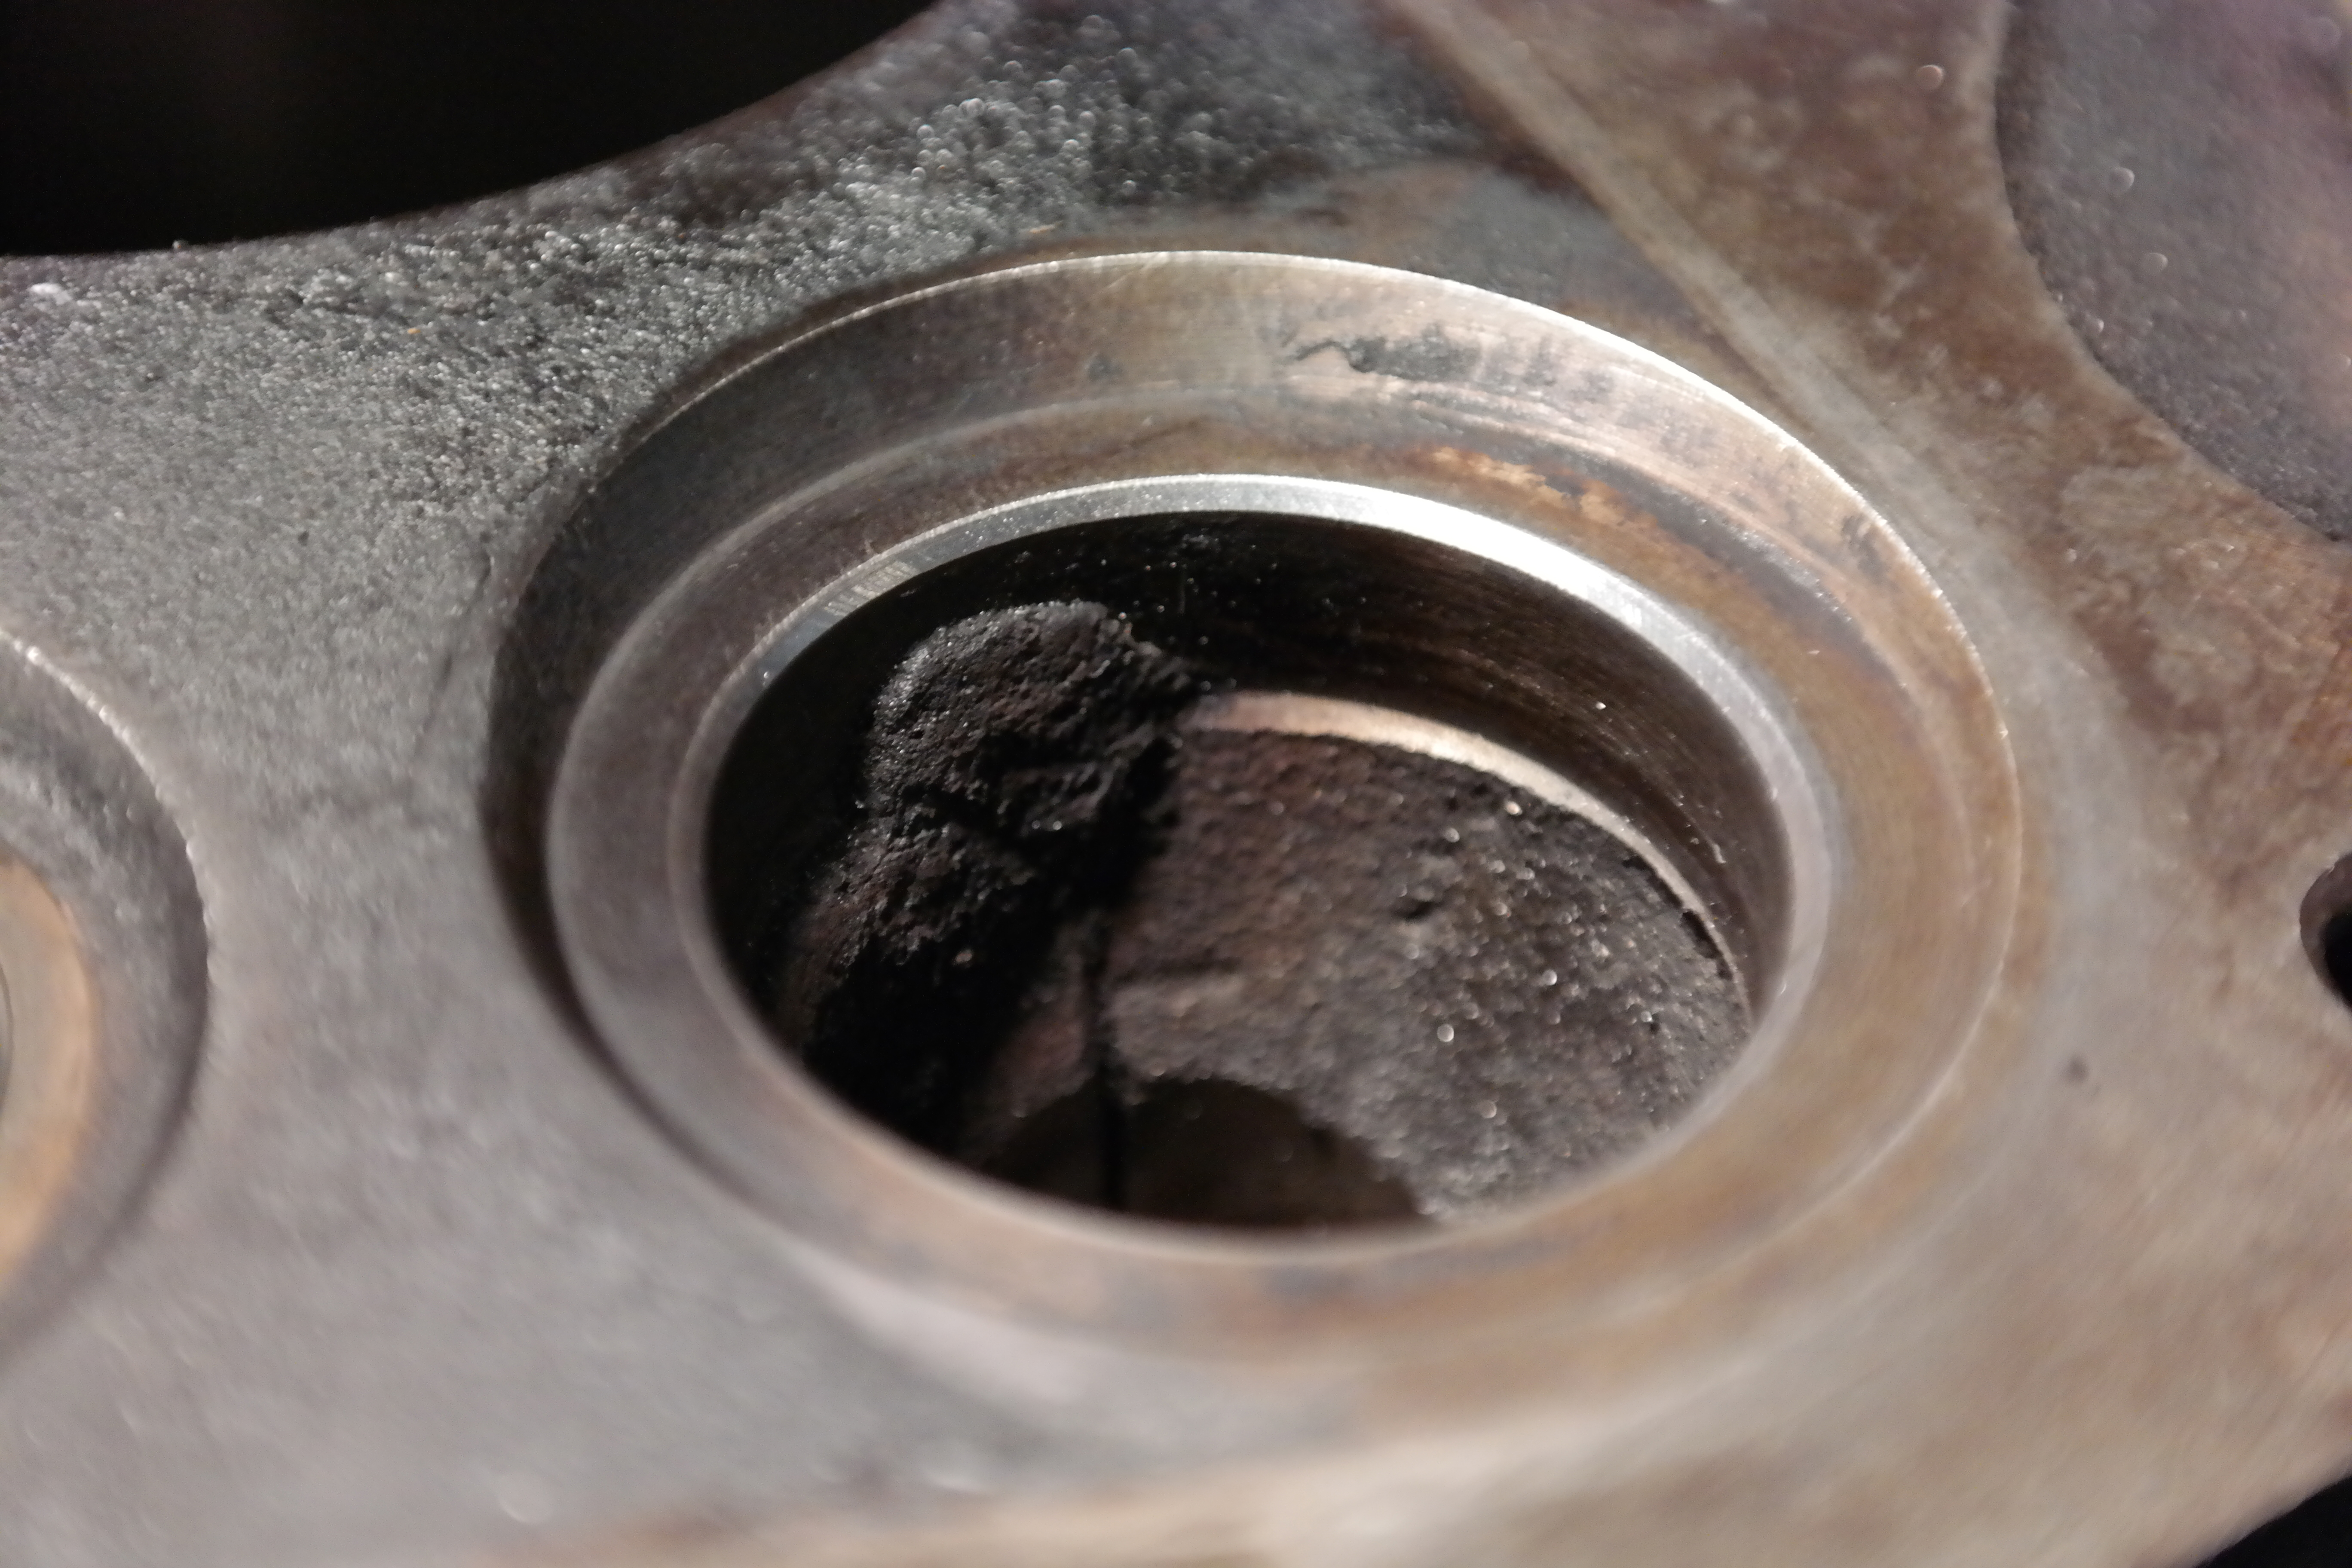
Photo: Valve seat after valve Job
First apply some of the lapping compound to the valve face area with your finger. It only requires a small amount of compound. Gently place your valve into the engine. Use the Lapping stick by pushing the suction cup into the top of the valve and rotate it back and forth in between your hands. After about 10 seconds remove the valve and wipe the lapping compound off of both the valve and the valve seat. Inspect and make sure the contact area is uniform and about in the middle of the valve face. Repeat this process with the other valve and seat.
Now just reinstall the valves and reset the valve clearances per your engine’s specifications. Now that you have replaced the valves, cut the seats, and confirmed it all makes contact with each other, your engine will start easier, produce more power, and give you less trouble as you work them.
This is just a small overview of what is involved in giving your vintage small engine a valve job. To learn more about the subject you can contact me for more information.
Thank you for saving the tractors!
- -Norman, iSaveTractors
Recent Posts
-

Engine Science: Rewind Your Small Tractor Engine Stator - Charging System Repair
Engine Science: How to Rewind Your Statorby Norman Ng, Founder of iSaveTractorsYour engine’s stator …Sep 10th 2020 -

Engine Science: The Digital Multi-Meter
The ability to detect, observe, and measure electricity is crucial when trying to understand how a …May 7th 2019 -

5 Common Small Engine Rebuilding Mistakes
The engine is the heart of your garden tractor. When performing heart surgery on your tractor, be aw …Jan 4th 2019